Thursday, June 28, 2012

Cutie Patootie No Bootie Shorts


Cutie Patootie NO-Booty Shorts

I hate too-short shorts.  I have long legs that make short shorts look teeny tiny-and that is not acceptable.  I also hate mom pants in shorts form.  It seems like there is no in-between sometimes.  So I took matters into my own hands and made my own.

In the very back of my jeans drawer I found a pair of ancient capris.  The kind that end just below the knee with a cuff –2002 called they want their clothes back-  As I would not be wearing them ever again as is, but they still fit good I thought I would try a refashion.

First I tried on the jeans and marked with a straight pin what length I wanted them to end up at. (Then I would add at least half an inch to that to account for fraying in the first wash)

I laid the jeans on a flat surface and smoothed out any wrinkles.  Make sure the jeans are lined up so the fold is exactly on the outside seam.  Next you make your cut.  You can be careful and draw with chalk where you want to cut…or you could just wing it like me.  For a little extra flair I curved the cut upwards when I got close to the side seam.  I really like how it turned out.  (For some extra coverage I might add a little lace in the future)

I also wanted to change up the color a little so I put the shorts in with my whites and bleached them.  They kept most of their color, I think because they were very thin denim with a lot of stretch…maybe a weird blend of fibers?

When I washed and dried them, they lost a little length due to fraying, but they are still much longer than anything I can find in stores…so overall I would call it a success!  Lastly I zipped a quick line around the very bottom with my sewing machine.  This will prevent them from fraying any shorter.

Thursday, June 14, 2012

Cabled Knit Scarf


A few months ago I posted a crafting bucket list that I wanted to finish before I metaphorically kick the bucket.  Well I am working at whittling that list down little by little.  So far I have already finished one item, learning how to ombre dye.  Whoop Whoop! Yay me!
But that was an easy one.  Now I need to focus on the more daunting items on that list.  Knit a sweater that I would be proud to wear, now that one is a doozie.   Before I can even think about the sweater, I have to learn how to knit.

I might have known how to do a knit stitch when I was like seven, but it took so long to get anywhere in knitting, and it wasn’t so forgiving on mistakes so I gave it up.  I found crochet and never looked back!  But you have to admit to look of knitting is completely different from crochet and I am an absolute fool for cables! So I figured it was time.
I chose this scarf pattern and found some left over yarn to practice with.  The Lion Brand website has some amazing visuals for learning the knit stitch, the purl stitch and how to cable.  For this particular pattern each set is 8 rows and then you repeat the same 8 rows over and over until the scarf is the length you want it. 
So just to practice, I knit about 3 sets (but I un-knit about 8-10 sets before I could figure out what I was doing). Haha!  My husband, although normally very supportive of my crafting addiction, said I was a mean knitter and wanted me to go back to crocheting!  Unlike crochet, knitting took a while to get used to the counting and precision.  He would ask me a question and I would shush him and say I had 3 more purls and 6 more knits before I could answer him.

Don’t worry though, it got much easier and now I can almost hold a complete conversation while knitting. Plus after doing about 50 sets I ended up memorizing the pattern.
This is a picture of my work in progress:

I am almost out of yarn which means whether I like it or not my scarf will be at its final length.  Next step: a matching hat.  I have a pattern picked out but it is at an intermediate level.  I am not even sure what all the abbreviations mean.  I am calling in for backup on this one:  Grandma Beth – you’re up!

Tuesday, June 5, 2012

Mint Chocolate Chip Cookies

These were really easy for a week-night treat!

Ingredients:

  • 1 bag Sugar Cookie Mix
  • 1/4 Tsp Peppermint Extract
  • A Few Drops Green Food coloring
  • 1 Egg
  • 1 stick softened Butter
  • 1 Cup Chocolate Chips

Directions:

  1. Preheat oven to 375 degrees
  2. Mix all ingredients together, then fold in the chocolate chips
  3. Scoop onto a cookie sheet
  4. Bake for 9-11 minutes

I never get sick of mint and chocolate. Never! Looking ahead to Christmas I might call these Grinch cookies...


Tuesday, May 22, 2012

Hand Dyed Canvas Slip-On Shoes


To go along with my new obsession with dyeing clothing I decided to dye a pair of canvas shoes.  As soon as I did this, I saw a commercial for the same shoes in Old Navy with a $15 price tag. I got them beat! My shoes only cost me $7! Woo Hoo!

Materials:
Wal-Mart white canvas shoes $4.50
Liquid RIT Dye $2
Elastic $0.50
Fabric Tac glue or needle and thread (leftover from previous casual crafting)
1 cup salt (who doesn’t have this in their pantry)

  • ·         Fill up your stainless steel sink (or large bucket) with steaming hot water.  Fill it up just enough to cover the shoes completely.
  • ·         Remove the laces from your shoes.
  • ·         Dunk the shoes in the hot water until saturated and set aside.
  • ·         Pour in half of the RIT dye and add in one cup of salt. Stir until salt starts to dissolve.
  • ·         Put in your shoes! Mine wanted to float right side up, so I used a plastic spatula to keep them in the dye.
  • ·         Stir them around for a few minutes until you get the color that you want.
  • ·         Drain the sink and run warm water over your shoes until the water runs clear. (make sure to dump out the water in the toes!)
  • ·         Put them outside to dry for at least a few hours.  Because it was rainy out this week it took 3 days for mine to dry inside. Sigh. I am not patient enough for that.
  • ·         Cut two pieces of elastic for under the tongue of your shoes. My pieces were about 3.5 – 4 inches long.
  • ·         I initially wanted to stitch the elastic in, but the canvas is pretty thick and I am lazy so instead I used fabric-tac. Haha.
  • ·         Use the fabric-tac to glue the elastic on either side of the tongue. Let dry.
  • ·         Show off your awesome shoes!


Total Cost: $7


Sunday, May 13, 2012

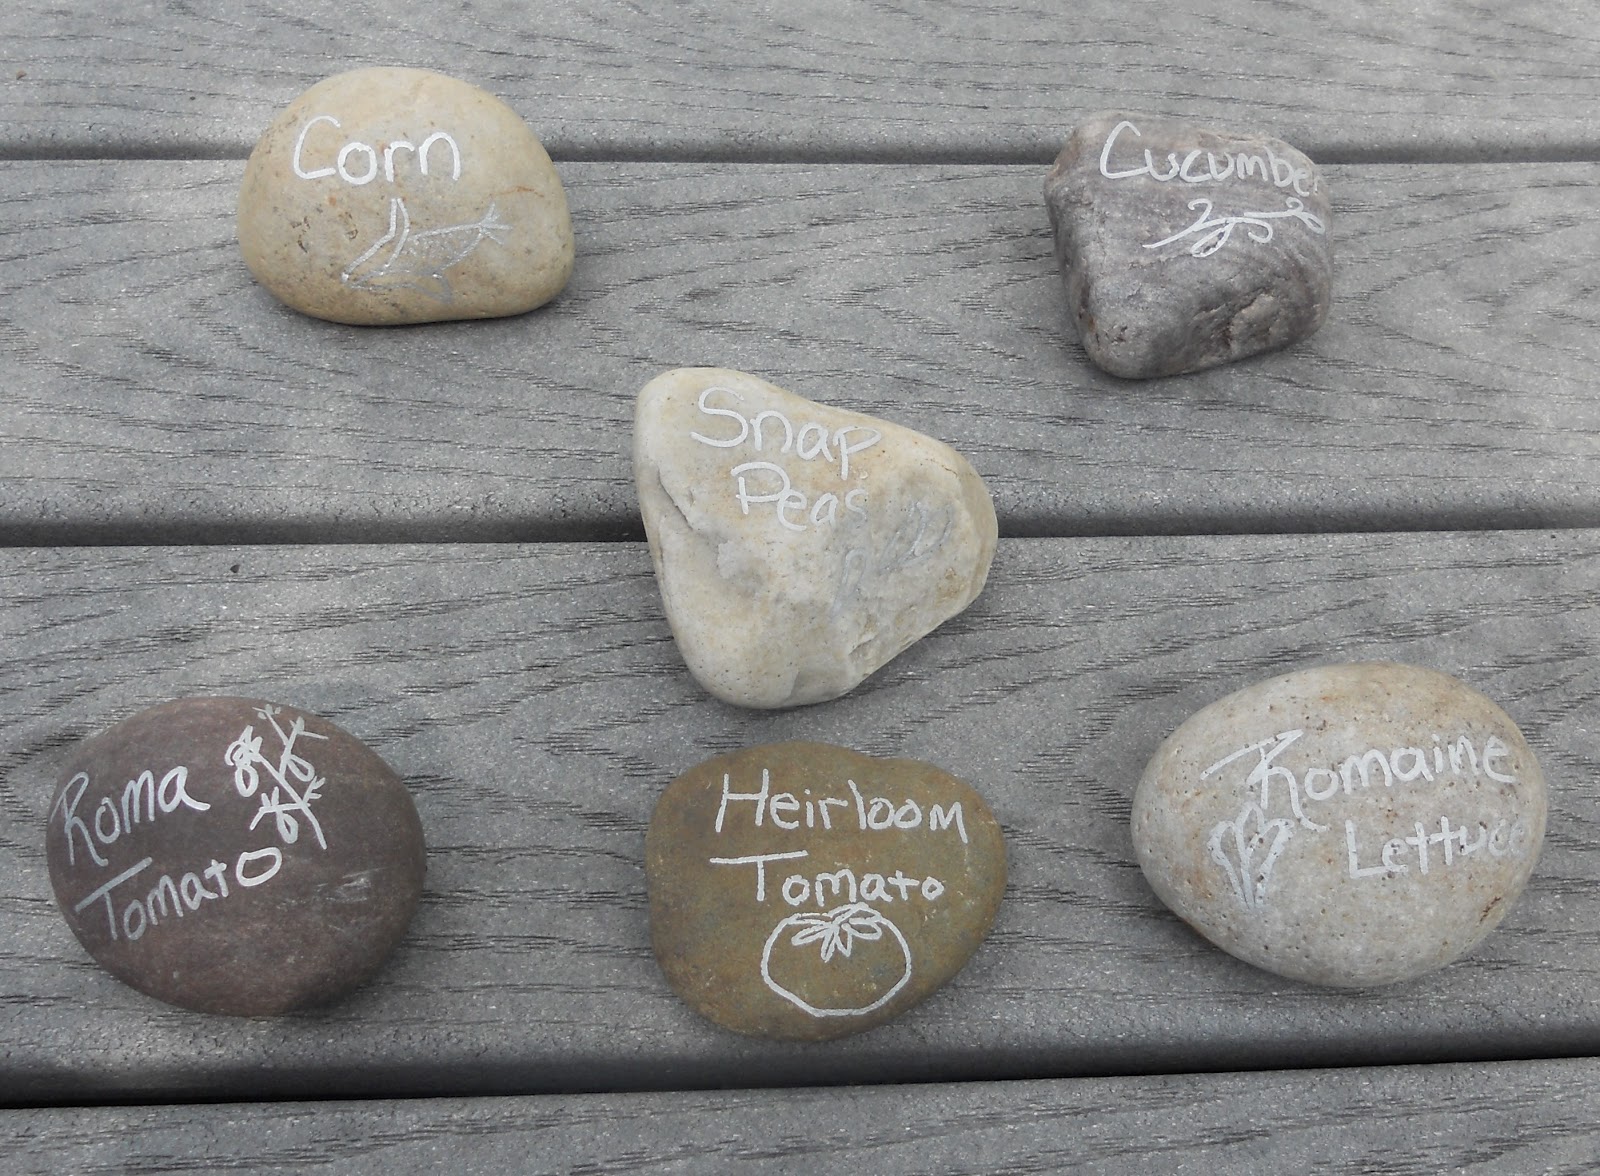
Natural Garden Markers


Well, mostly natural. All you need are some pretty rocks and a Sharpie Marker. I used the silver metallic color because it is what I had in my junk drawer, but I am sure any color would work just as well.

Find the rocks you like, preferably with one flat side and large enough to stay put where you need them. Wash all of the dirt off and thoroughly dry. Once they are dry you can mark them up! 


Easy Peasy. 
Go easy on this picture, I had been digging in the garden for a few hours by this point!

Saturday, May 5, 2012

5 Minute Ombre dye T-Shirt


The first of many I am sure.  This was so easy to do and it only took 5 minutes!  I am seriously going to ombre dye everything I can find this summer.  I might be addicted.

Materials:
$5 Wal-Mart Cotton T-Shirt
RIT liquid Dye
1 Cup Salt

1)  Fill your sink with hot water.  I filled it with steaming hot tap water to about 5-6 inches deep.
2)  Wet your shirt in the water (the one you are dying, not the one you are wearing). Wring it out so it isn’t dripping, and lay it flat on the counter so there are no wrinkles.
3)  Pour in half the bottle of dye and one cup of salt.
4)  Stir until the salt is mixed in with the water.
5)  This part happens quick- dip your shirt in the dye up to the neckline being careful not to splash.  Slowly lift the shirt out of the dye; stopping just below the bust line.  Continue removing the shirt form the dye, pausing at the bottom of the shirt.
6)  Pull the stopper and let the dye drain out of the sink.
7)  Starting at the bottom, run warm water over the shirt moving your way up,  Keep rinsing until the water runs clean.
8)  Lay the shirt outside on a clothesline or flat on a spare towel until thoroughly dried.

Wear with pride!

Total cost: $7.50

Friday, April 6, 2012

15 Minute Storage Bag

We got a doggie!  We are so excited to invite Cali into our family (that’s right…her name is Cali Cail… giggle)! But with the new addition came lots of STUFF...and we quickly realized we had nowhere to store it all.

The biggest issue was all of our gloves, hats, mittens and ear warmers for the early morning walks.  They ended up all over the kitchen table and countertops.  As if it isn’t hard enough keeping the counters free of clutter!
I found some scraps of home décor fabric that I used in the old apartment, and although I didn’t plan it, it was a perfect match for my kitchen! Woo Hoo!

All you need is two rectangles of fabric that are the same size and a long thin rectangle of fabric for the handle.  The size of the rectangles can be whatever you want, depending on how large you want your bag to be. For your reference I used 2- 13X23 rectangles and one 20X2.5 rectangle.
Fold one of the large rectangles in half width wise, right side facing in, and sew a line up both sides.  Do the same with the other large rectangle.
Turn one rectangle right side out and place the 2nd rectangle (still inside out) inside.   With the raw edges together fold the top down ¼ inch, and then down another ¼ inch.  Sew the hem down, getting as close to the hem edge as possible.
Now for the handle:  Fold the narrow, long rectangle in half length wise, with right sides together, and sew up the side to make a tube.  Turn the tube so the right side of the fabric is facing out. Now all you have to do is attach it to the back of your bag.
Cut it to the length you want it to be plus 2 inches. Fold both ends up one inch and pin to the bag.  To make sure the handles would be extra secure I sewed them on in the shape of a box with an ‘x’ inside of it.  If you are not comfortable with this you can just do zigzags back and forth for the full one inch.
Done.  15 minutes right?!
Total Cost: Free if you use scraps!
Here it is all filled with stuff.